
Settings
Customize your branding, team, and agency preferences.
The Settings area is your control center for customizing TravelBuilderPro to match your agency’s brand and workflow. From uploading your logo to managing team members, all configuration options are organized in one place.
What you’ll learn:
- Configuring your agency information
- Customizing branding and appearance
- Setting up default templates and legal terms
- Managing team permissions
- Connecting external forms
- Understanding your subscription plan
Accessing Settings
Click Settings in the main sidebar to enter the Settings area.
You’ll see a dedicated sidebar with all configuration sections:
Agency— Basic organization informationBranding— Logo, colors, custom URLPublic Design— Default design for public trip pagesLegal Terms— Standard policies for proposalsPermissions— Team role capabilitiesForms— External form integrationsYour Plan— Subscription and billingTeam— Team members and invitations
Agency Information
The Agency section stores your organization’s basic details.
Available Fields
Organization Name— Your agency’s official nameWebsite URL— Your agency’s website addressPhone Number— Contact phone for clientsDefault Currency— Currency for trip pricing (150+ currencies)Default Language— Default content language for new blocks and trips (out of up to 66 languages your agency can enable)Description— Brief description of your agencyAddress— Full business address
Why This Matters
Organization Nameappears on trip proposals and client communicationsDefault Currencysets the currency symbol for all new tripsDefault Languagedetermines the initial language when creating contentAddressappears on professional proposals and invoices
Click Save after making changes.
Branding
Customize how your agency appears to clients with your logo, colors, and custom URL.
Primary Color
- Click the color picker square
- Select your brand color or enter a hex code (e.g.
#3b82f6) - Preview updates instantly
Used on buttons, accents, and headers across client-facing pages.
Agency Logo
- Click
Upload Logo - Select an image file (JPG, PNG, SVG, or WebP)
- Preview your logo
- Use
ReplaceorRemoveif needed
Favicon
- Click
Upload Favicon - Select an icon file (ICO, PNG, or SVG)
- Preview how it appears in browser tabs
Recommended size: 32×32 px
Custom URL
Format: travelbuilderpro.com/share/your-agency-name
- Enter your desired URL
- Green checkmark = available
- Red X = already taken
Requirements:
- 3–30 characters
- Lowercase letters, numbers, hyphens only
- Must be unique
Public Design
Choose the default design applied to your client-facing trip proposals and public pages — the default cover image, the template, its layout, and the typography preset.
Default Trip Cover Image
- Click to select an image
- Choose from uploads or search Unsplash
- Used as the cover for every trip that hasn’t enabled
Use a custom cover image
Selecting a Template
- Browse available templates
- Click to select
- Preview shows branding applied
Choosing a Layout
Pick how the selected template arranges content on the public page — a single-column or two-column layout. A mini-schema previews each option.
Typography
Set the font pairing used across your public pages. Pick a preset from the Typography dropdown — Modern, Editorial, Minimal, or Classic. The selected preset is applied immediately to the live preview.
What Happens
- New trips use this design automatically
- Existing trips update to the new default
- Individual trips can still be customized
Legal Terms
Set default legal sections for all trip proposals.
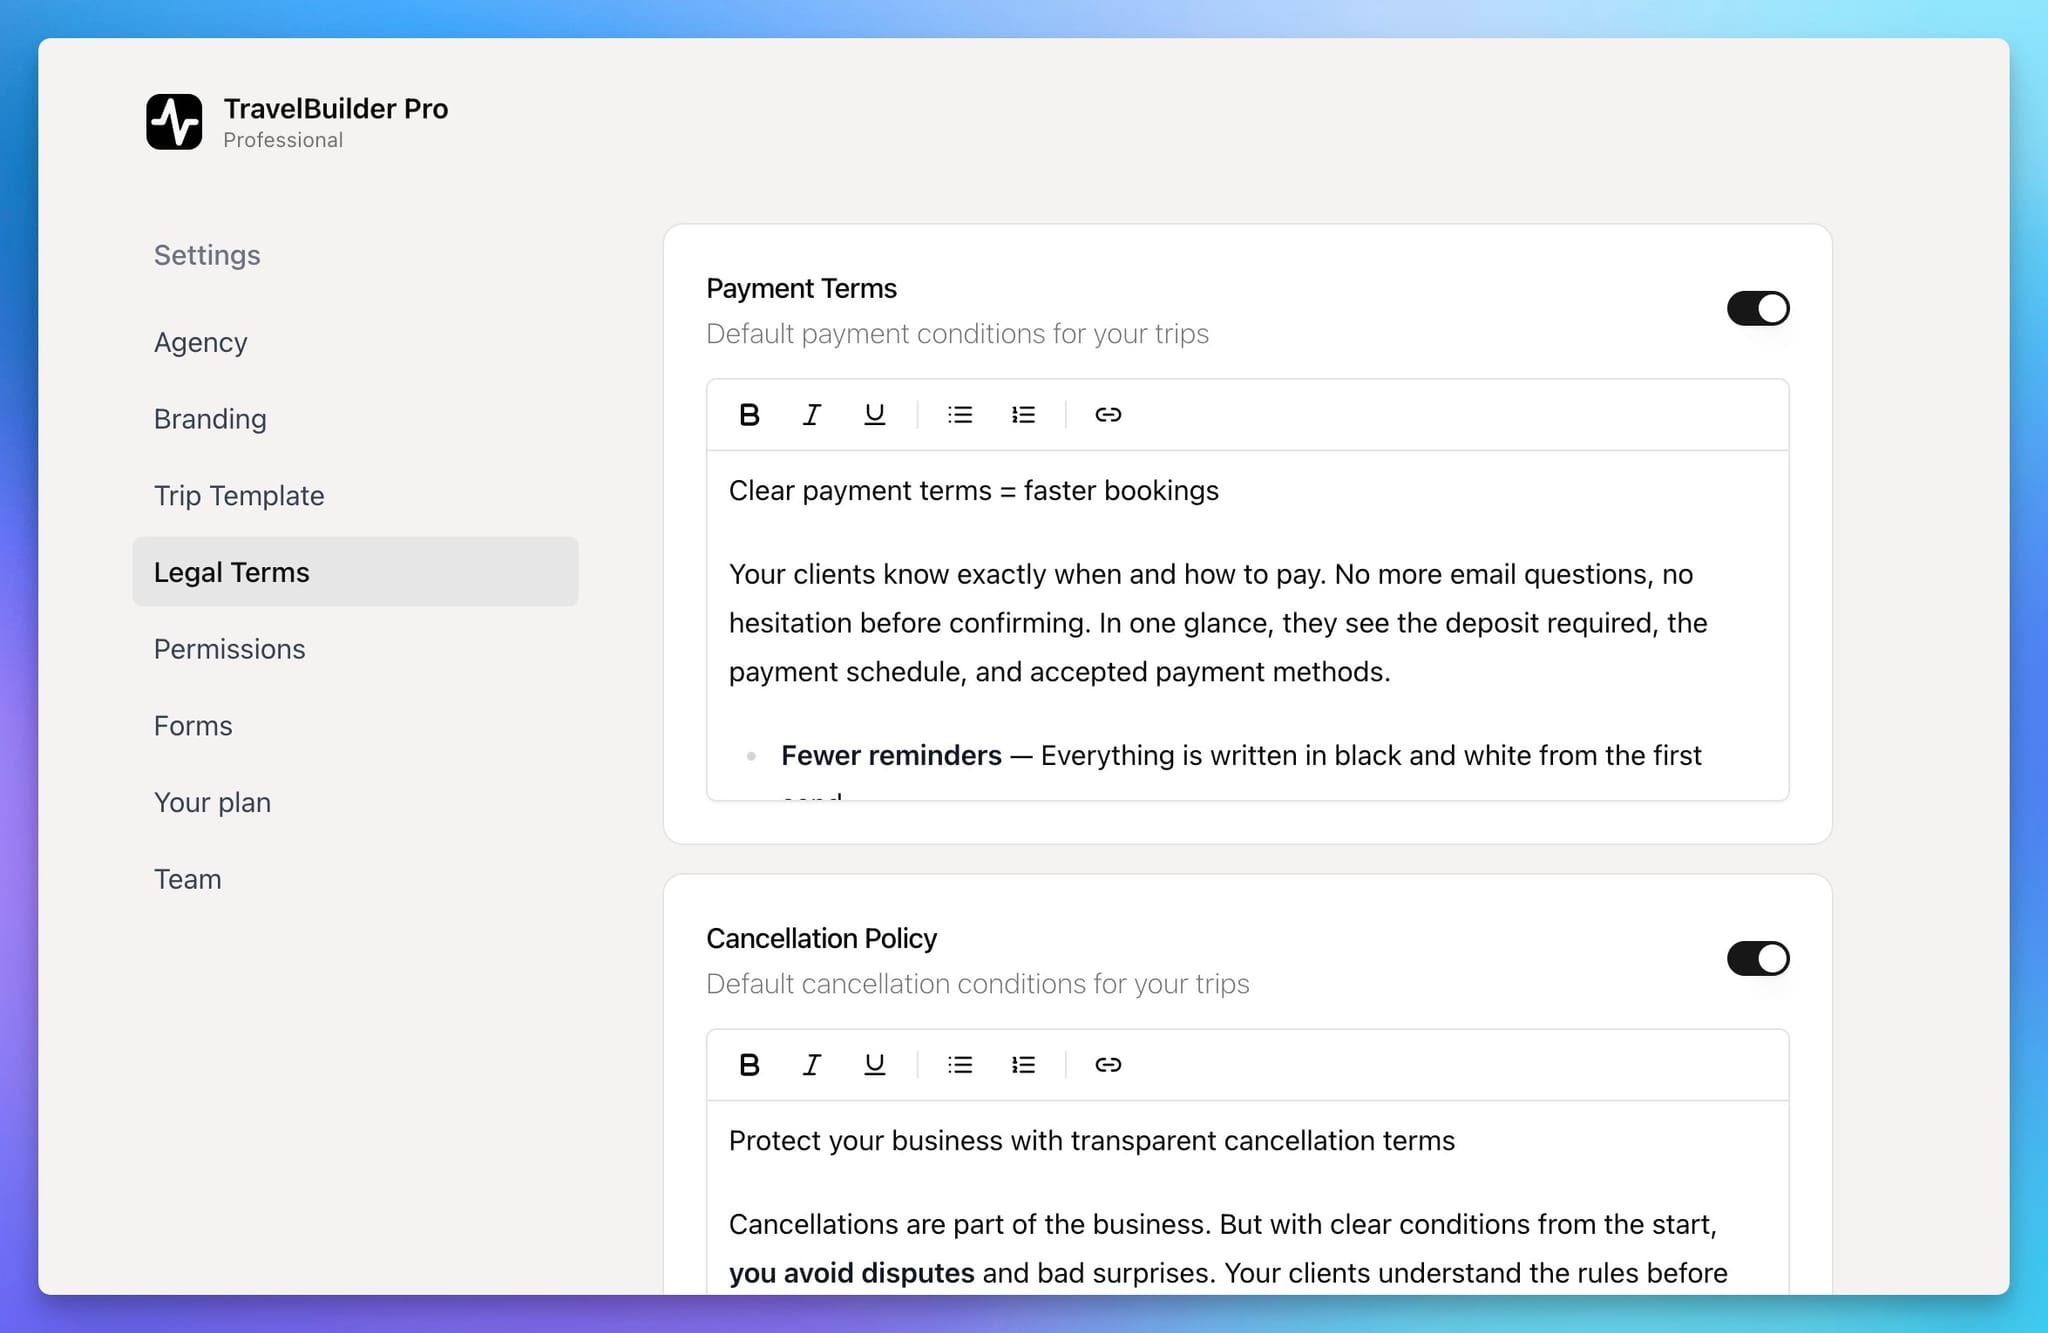
Define your legals terms as default for all your trips
Available Sections
Payment Terms— When and how clients payCancellation Policy— Booking cancellation rulesPassport & Visas— Travel document requirementsInsurance— Travel insurance information
Configuring Each Section
- Toggle section on/off
- Edit content with rich text editor
- Format with bold, italic, links, and lists
How It Works
- Enabled sections appear on all new trips
- Terms can still be edited per trip
- Disabled sections stay hidden unless enabled manually
Permissions
Control what team roles can do.
Roles
Agency Admin— full access including SettingsManager— Trips, contacts, workflowAgent— Trips and contacts
Configurable Permissions
Permissions are organized into four groups, each controlling a part of the trip editor. For every permission you can independently allow or deny Manager and Agent — Agency Admin always have full access.
Informations
Edit Trip Legal Terms— edit legal terms on individual tripsEnable Trip Map— show the interactive map on tripsChange Trip Owner— reassign the agent shown on public trip pages (see Trip ownership)
Pricing
Edit Trip Currency— modify the currency on individual trips
Design
Edit Trips Template— change template and layout on trips
Quote
Quote Tab Visibility— see cost breakdown and margins in the trip editor
When a permission is disabled for a role, the corresponding field or tab is hidden or read-only for users in that role.
Forms
Connect website forms to capture leads automatically.
How It Works
- Create a form on your website
- TravelBuilderPro provides a webhook URL : copy/paste it on yourwebsite
- Submissions on your website create contacts automatically into CRM
Setting Up a Form
- Click
Add Form - Copy webhook URL
- Paste into your form settings
- Submit a test entry
Field Mapping
Map incoming fields to contact fields:
Email— email, contact_emailFirst Name— first_name, namePhone— phone, telephoneTrip Type— trip_type, interestDestination— destination, locationTravel Dates— dates, travel_datesBudget— budget, price_range
Auto-detection is provided, manual adjustments allowed.
Monitoring Submissions
For each form you can see:
- Total submission count
- Last submission date
- Form status (active / inactive)
Your Plan
Manage your subscription and billing.
Current Plan Overview
- Plan name and billing cycle
- Number of team members
- Cost per user
- Total monthly or yearly cost
Available Plans
Starter— Small agenciesProfessional— Growing agenciesPremium— Large agencies
Billing Options
Monthly— FlexibleYearly— Discounted (typically 2 months free)
Changing Your Plan
- Select a plan
- Review proration
- Confirm
- Billing updates automatically
Trial Period
- 7-day free trial
- Full feature access
- No credit card required
- Reminder badge shows remaining days
Team
Manage team members and access.
Team List Information
Each member shows:
Email— User emailRole—Agency Admin,Manager,AgentStatus—Active(green) orPending(yellow)Actions—Resend invite,Remove member
Inviting Team Members
- Click
Add Member - Enter email
- Select role
- Send invitation
After Inviting
- Invitation email sent
- User accepts
- Account created
- Status becomes
Active - Access granted
Managing Existing Members
Resend Invitation
- Menu (⋮) →
Resend Email
Change Invitation Email
For pending invitations only — useful if the address was wrong or the invite never arrived:
- Menu (⋮) →
Change email - Enter the new email and confirm
The previous invitation link is invalidated and a fresh invite is sent to the new address.
Remove Member
- Menu (⋮) →
Remove - A
Reassign datadialog opens listing every item the member owns (trips and other assigned items). Pick another active team member to receive ownership of all of them — this step is required to protect data integrity. - Confirm. Ownership is transferred and the member’s access is revoked.
Role Capabilities
Agency Admin— Settings, billing, team, all featuresManager— Trips, contacts, tasks, suppliers, libraryAgent— Trips, contacts, tasks (permission-based)
Per-Seat Billing
- Each member = one seat
- Adding increases cost
- Removing decreases cost (prorated)
- Header shows:
X users × $Y/user = $Z/month